Watch photography: How to take better photos with your phone
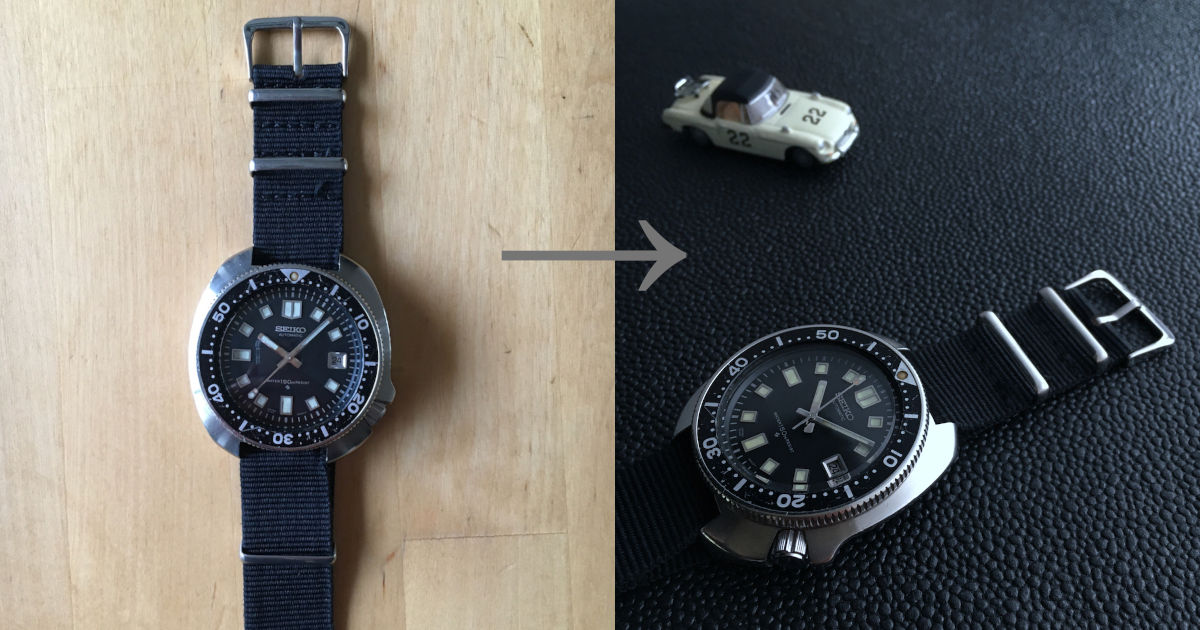
Whether it's for social media, a sale listing, or just for fun, we often want to take cool pictures of our watches but with their small size and reflective surfaces, it's not easy. I want to show you step-by-step how to overcome the challenges of watch photography with just a smartphone and no other fancy equipment. Sure, a proper camera will give you more artistic control (maybe that's for a future article) but if a phone is all you have, you can still create images you'll be proud to share.
Before we start, grab a lint-free cloth and wipe your watch clean, even if it already looks clean. It's a good idea to also set the hands to around 2:09 for a pleasing look that doesn't block the date or writing on the dial. Now we're ready, let's go…
Step 1
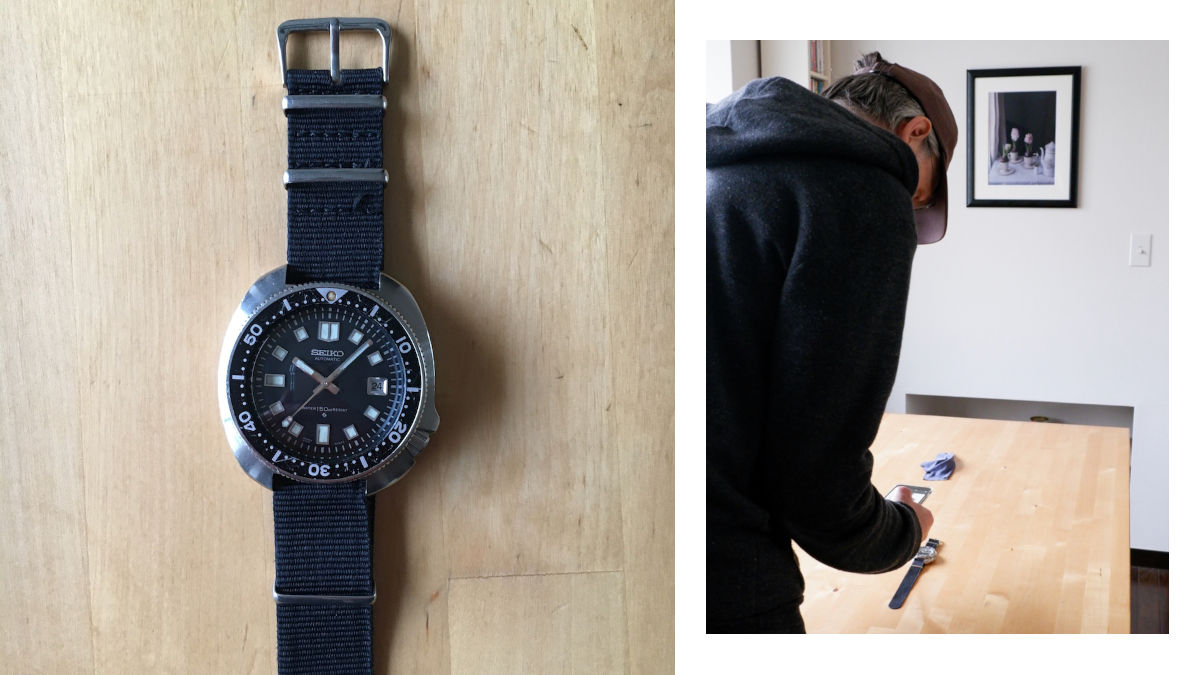
Let's start at the beginning — a basic overhead shot of the watch (a Seiko 6105-8110). Hmm. Not only does it look boring, you can even see the reflection of the camera on the crystal. We can fix that by moving to one side.
Step 2
Taking the shot from an angle is much better, not just because we don't see our own reflection any more, but because diagonal lines are generally more pleasing to the eye. There are also a couple of composition tips being used here:
- Make diagonal lines go to the corner of the image. The strap is the main diagonal here so I've positioned it to lead in from the bottom left corner.
- Position the subject off-centre, e.g. one third or two thirds across the picture. In this case, the watch face is the subject so I've decided to put it in the lower third.
But we still have a big problem — the bright window reflection on the crystal and table. We need to soften (diffuse) that light.
Step 3
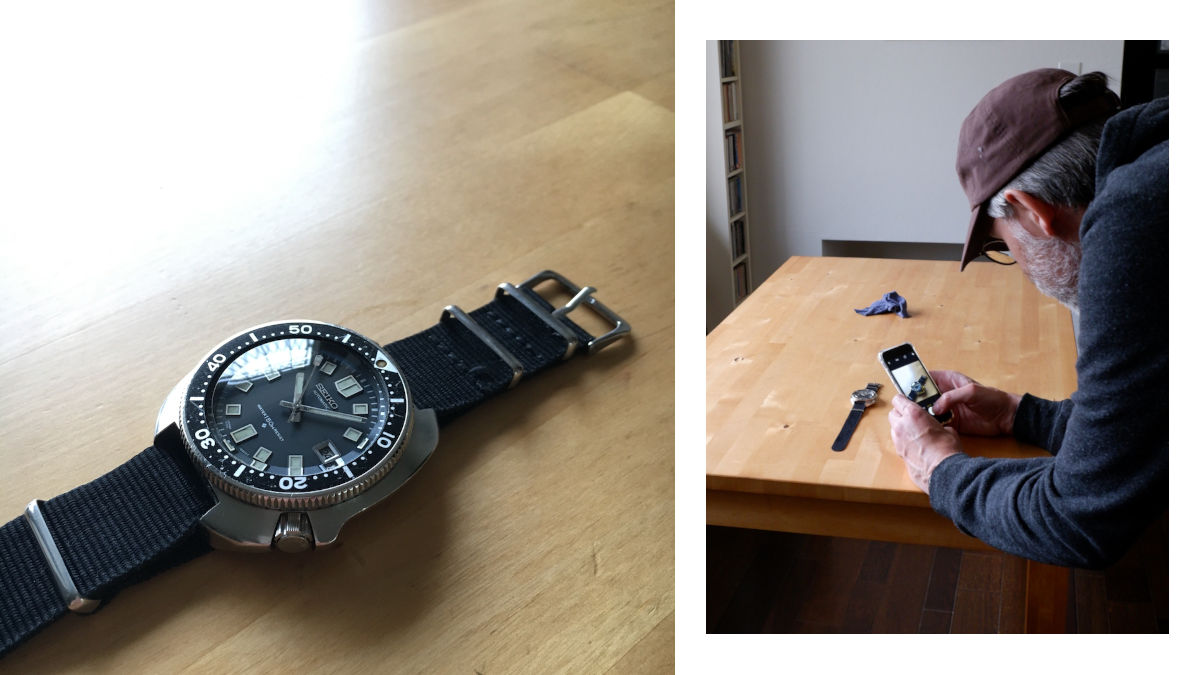
We're not using any fancy equipment today so to diffuse the light, grab some basic parchment/baking/greaseproof paper from the kitchen. Use it to create a kind of tunnel between the camera lens and the watch, making sure it stays out of the photo. In addition to reducing reflections, it softens shadows too which will highlight the watch. I also put on a black glove as my hand was visible in the reflection. Ah, the challenges of domed crystals!
The image has improved but my table surface doesn't complement the watch, so let's try something different.
Step 4
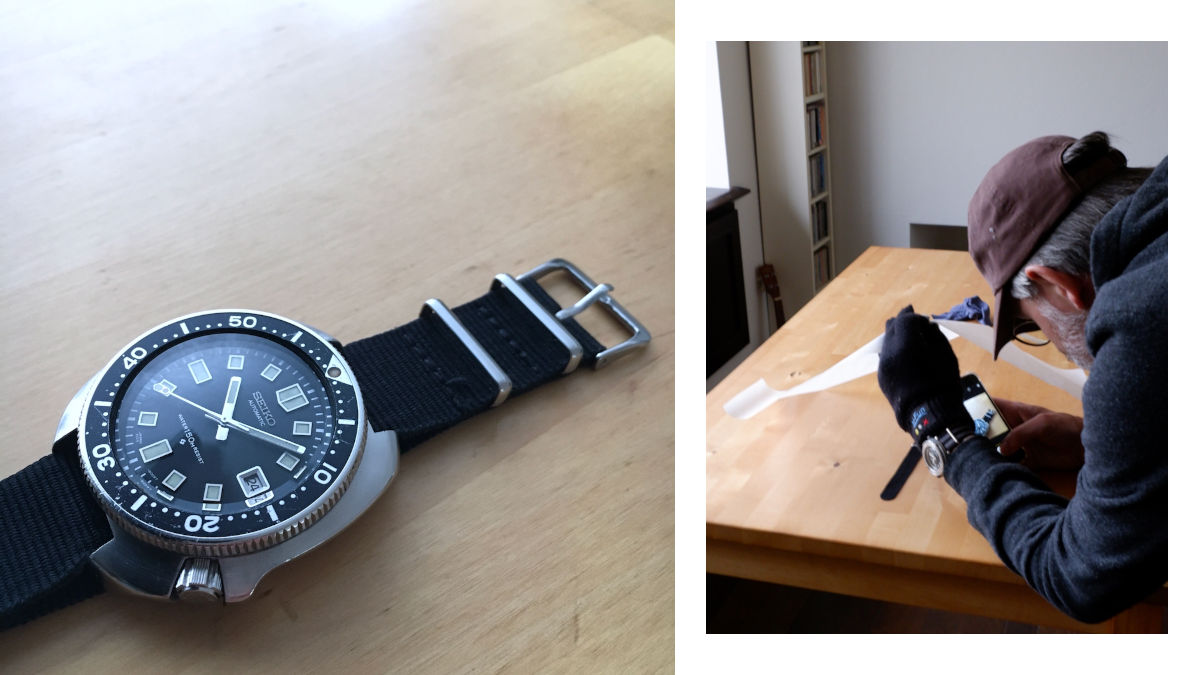
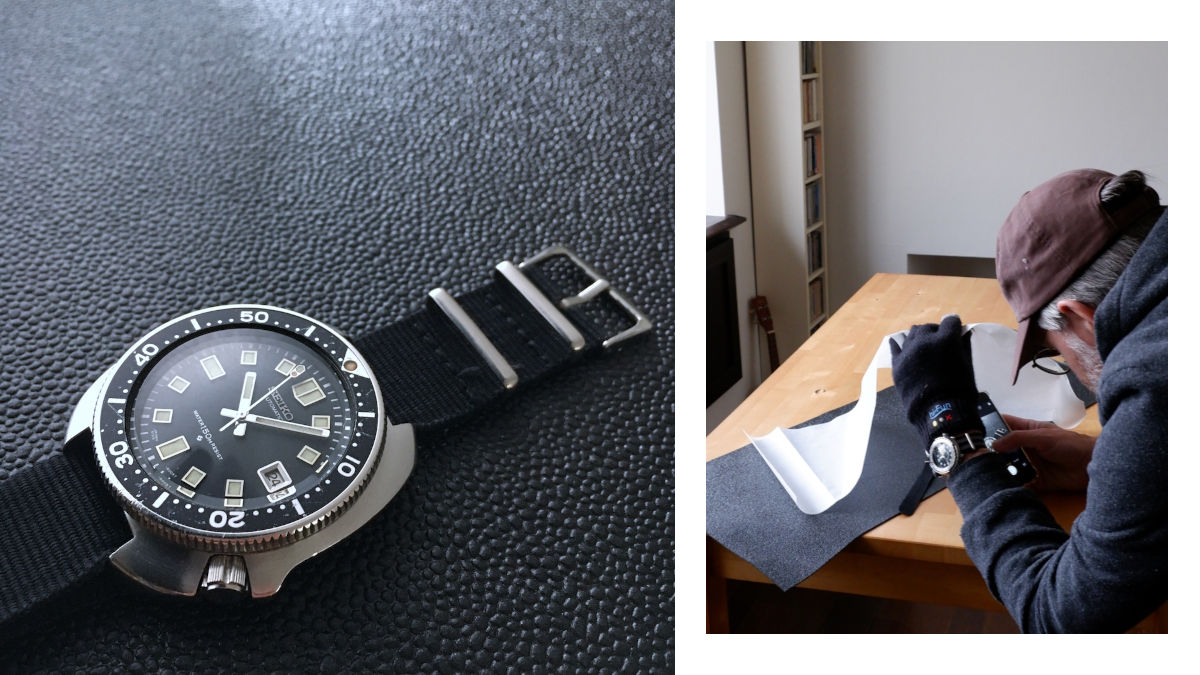
That's better, something a bit more interesting. If you're taking photos to sell your watch then plain white paper is best, otherwise you can use anything as a background — soft fabric, old wood, shiny plastic, dried leaves, etc. Remember to think about whether the background complements or clashes with the watch. Consider things like colour, texture, shape or situation, for example wetsuit material for a diver's watch.
One more thing: Notice how the texture of the background is going out of focus towards the back of the photo? This is called "bokeh" and is achievable even with a phone camera, but the main subject has to be pretty close to the camera lens for it to be noticeable, hence why I moved closer to the watch.
Step 5
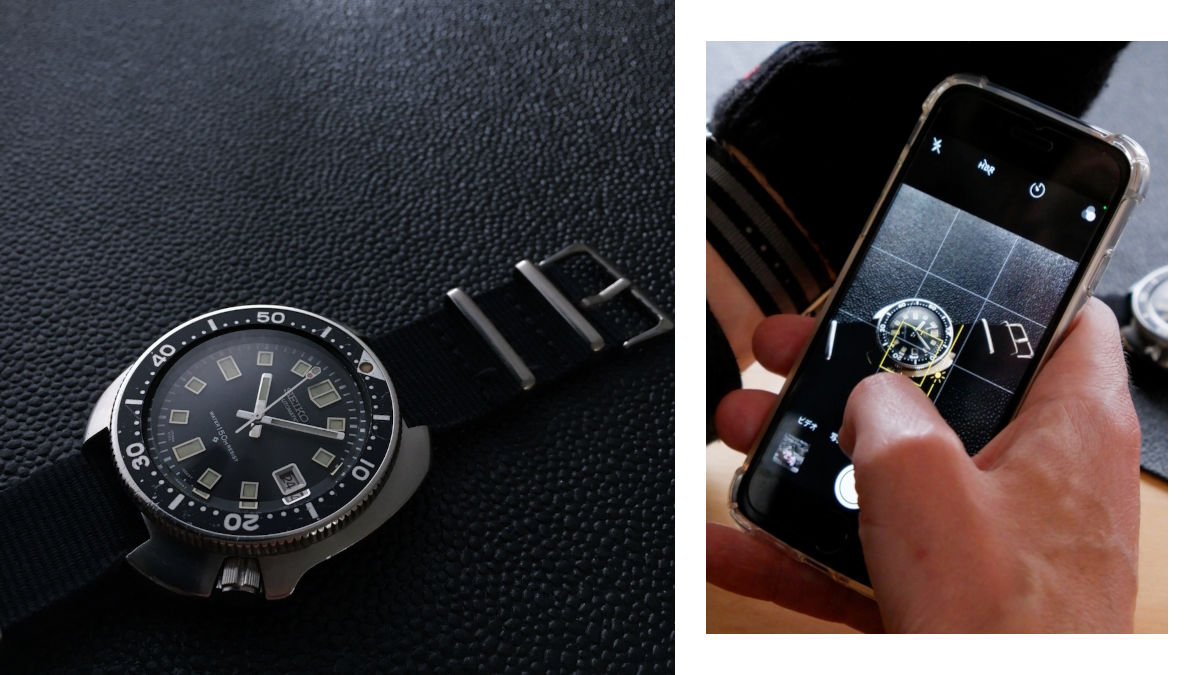
Now we're getting somewhere but I feel the light on the crystal and background is still too bright. This is where we bring in another photography tip:
- Expose for the highlights. In other words, adjust the brightness of the image so that the brightest areas are not pure, flat white.
In the camera app, after tapping to focus I swipe down on the screen which reduces the brightness (exposure), so that the bright part of the case is no longer white. What a big improvement!
Step 6
Time for another tip:
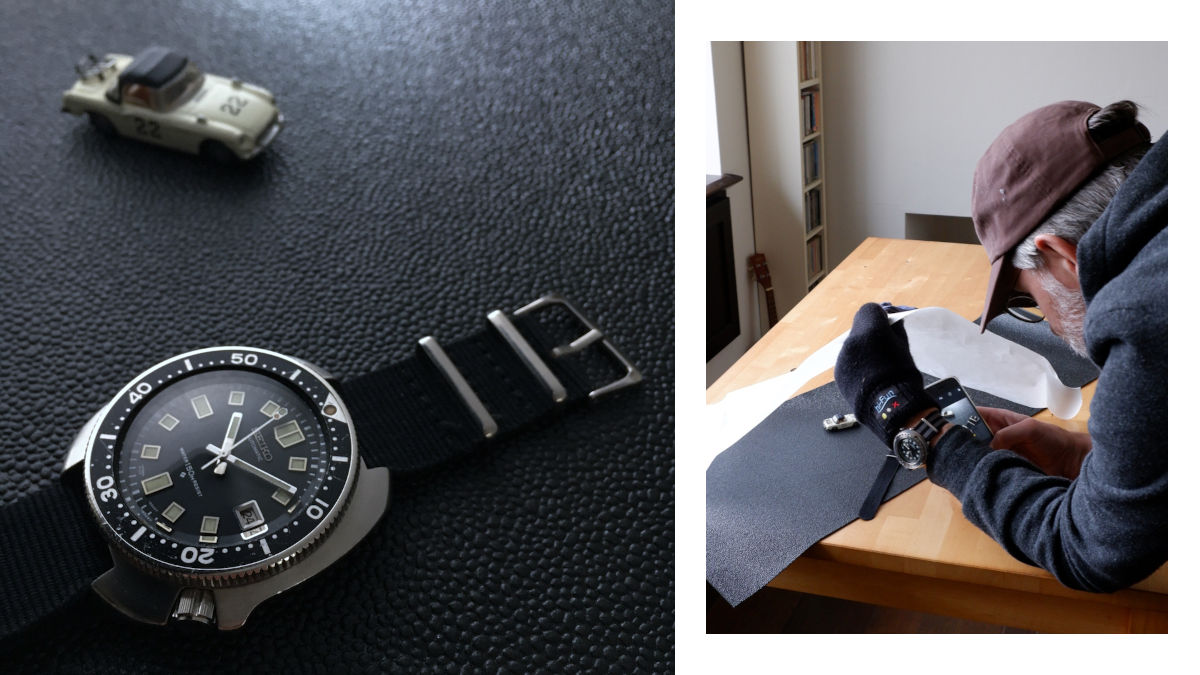
- Successful images have a message for the viewer. It doesn't have to be complex but some kind of theme or story is more compelling than just "look at my watch".
I want my message to be "icons of the 1960s" so I'm going to bring in a prop. Of course, you're free to go wild with props but as with backgrounds, think about how they complement the watch and support your message. Because this watch is monotone I want a prop that's also monotone so it won't be distracting. I've chosen a model of an MGB roadster which is not only from the 1960s, but also has a similar active/outdoor vibe to the watch.
Step 7
And now for the final photography tip:
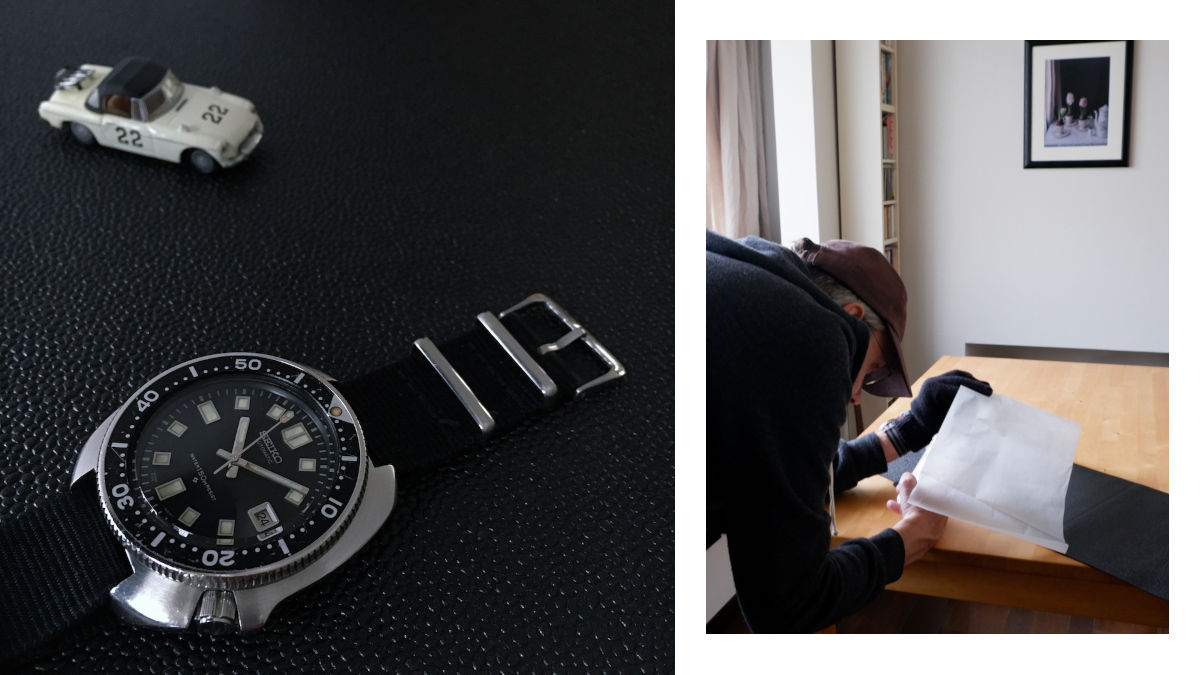
- It's all about the light. How well you control the light (direction, intensity, colour, number of sources, etc.) makes the difference between an average photo and one that stops people mid-scroll.
I'm going to try moving the watch so that the light hits it from a different direction and see what effect it has. So far we've had the light coming diagonally towards the camera (roughly from the 9 o'clock direction on the watch) so let's try with the light coming over my left shoulder (roughly from the 6 o'clock direction). Hmm, I don't really like how it emphasises the bottom of the watch case. Try again.
Step 8
Now the light is coming over my right shoulder (roughly from the 3 o'clock direction) and I feel this is worse. It almost looks like I've used a flash, with the light hitting the car and watch more or less from the same direction as the camera lens, making them feel flat. Try again.
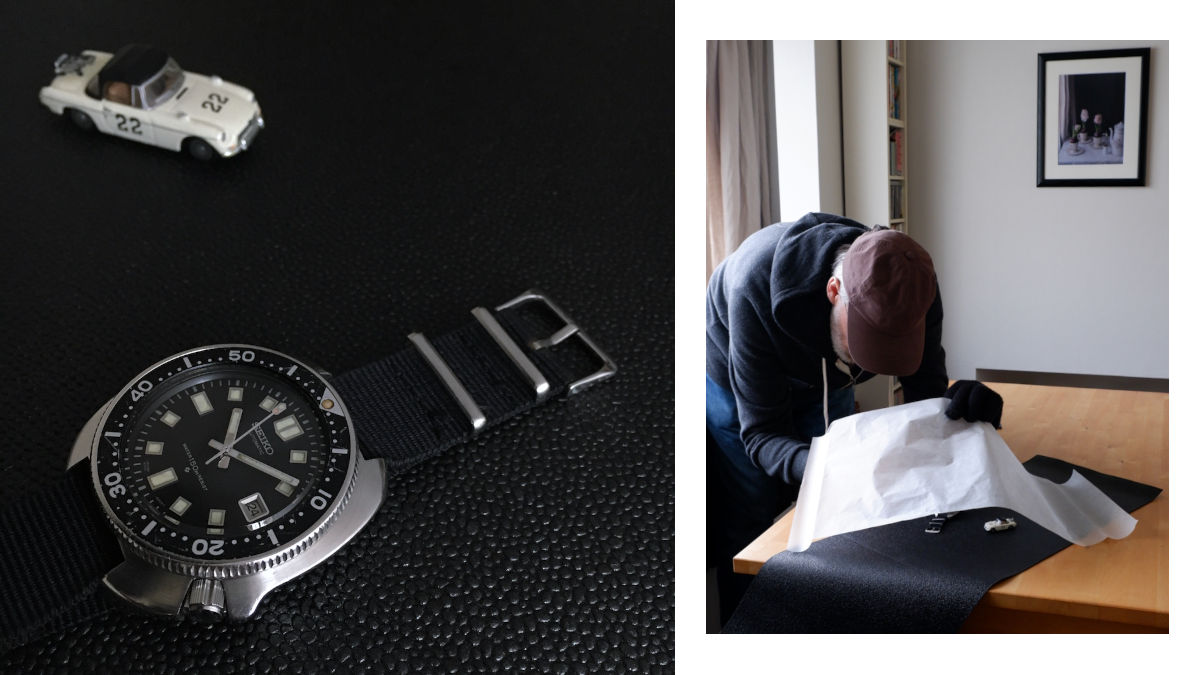
Step 9
The light is now coming diagonally towards the camera again but this time from roughly the 12 o'clock position. I like it! Of course, art is subjective so there's no right or wrong, but generally light coming from the side of the camera or diagonally towards it creates a more pleasing image. And I'm pleased with this final shot. Sure, it's not perfect, but the aim was to take an interesting watch photo with a phone and, compared to our starting picture above, I think we've achieved that.
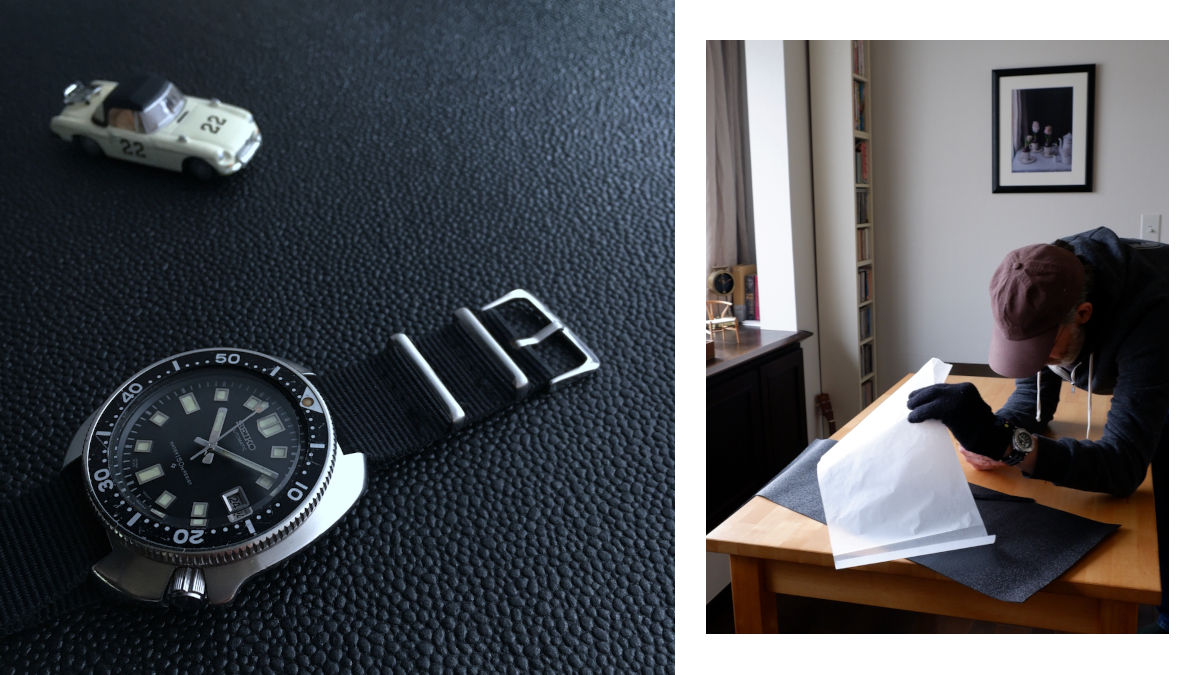
Taking it further
There are several things you could do to improve on this setup, either to make the photo better or for an easier workflow. Some suggestions are:
- Something to hold the paper diffuser. This will free up your hands, and even a cardboard box with big holes cut out would work as a frame for the paper.
- A tripod. This will keep the camera steady and your hands free, especially if you use the self-timer.
- Setting the white balance. Sometimes photos will have a slight blue or orange tint depending on the light source and surrounding objects. The camera's auto setting tries to adapt to this but it may be best to set it manually.
- A camera and lens with more control. This is a big jump up but a proper camera and lens mean you can more easily control bokeh (out-of-focus backgrounds) and how much of the background to include or exclude.
- A continuous light source. Even if it's just an LED lamp, having a dedicated source of light means consistency across your photos and, again, more control over how your image looks.
If you liked this, check out more articles about repairing, restoring and enjoying Seiko watches.