How to remove scratches from an acrylic watch crystal
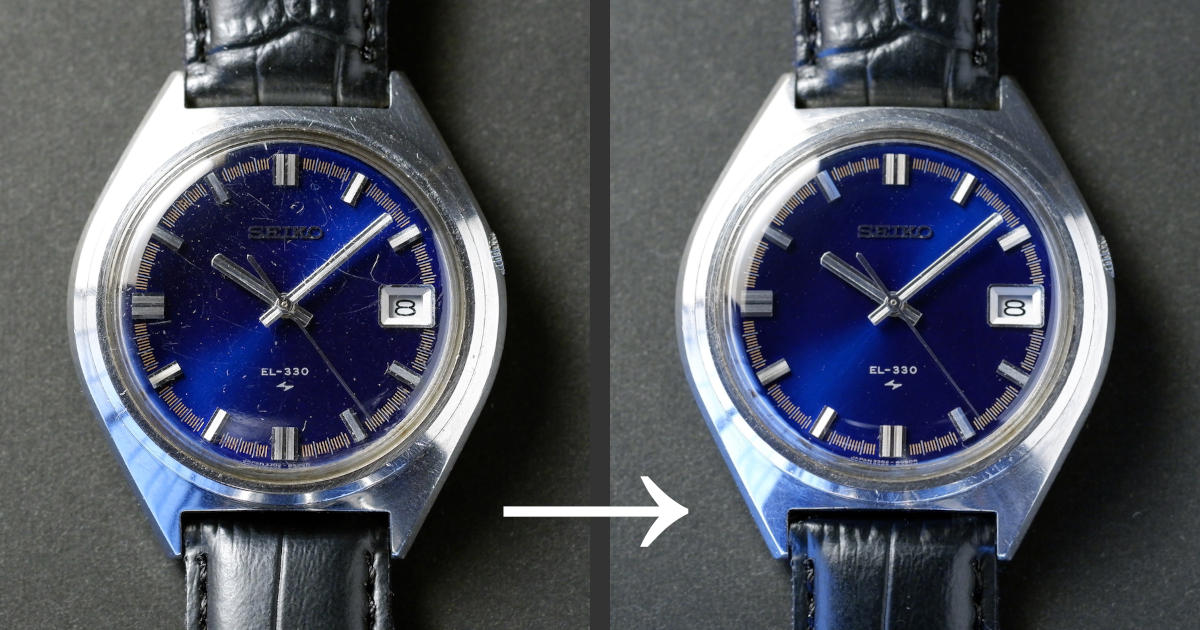
If the scratched glass on your watch is not actually glass but acrylic (plastic), it's pretty easy to remove those scratches yourself without specialist tools. This guide will show you how. Note that cracks and very deep scratches cannot be fixed like this, but the crystal will still look better so it's worth trying anyway.
Step 1
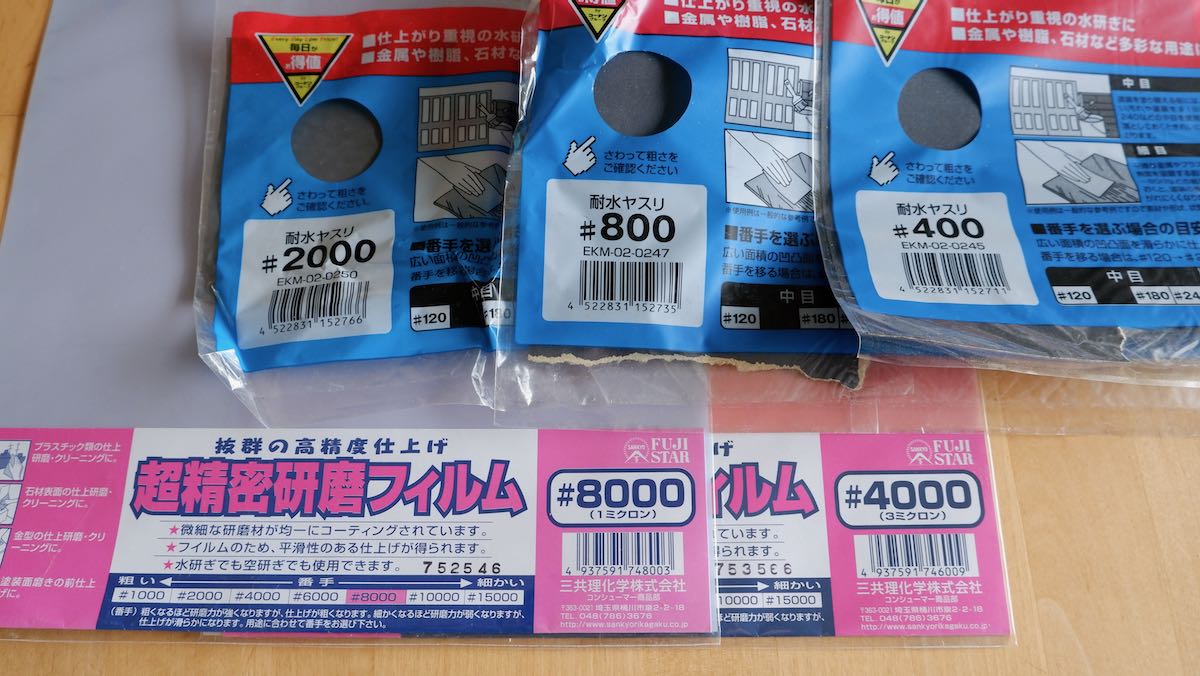
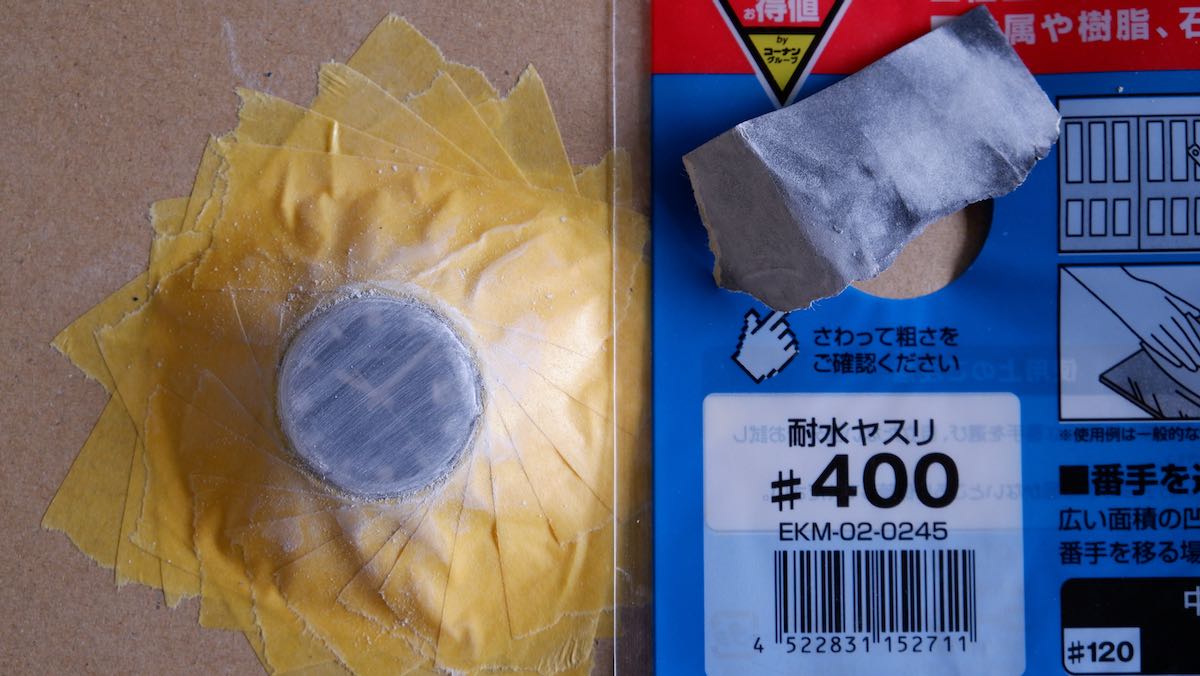
Polish such as Polywatch only works with very fine scratches. For anything more noticeable, multiple grades of sandpaper are needed, working from rough to fine. The lower the number, the rougher the paper is. I'm going to start with 400 and roughly double the number for each stage. Up to around 4000 is probably fine but I had grade 8000 (which doesn't feel rough at all) so I'll use it and see if it makes a difference. We'll still need to finish with a polishing stage in any case.
Step 2
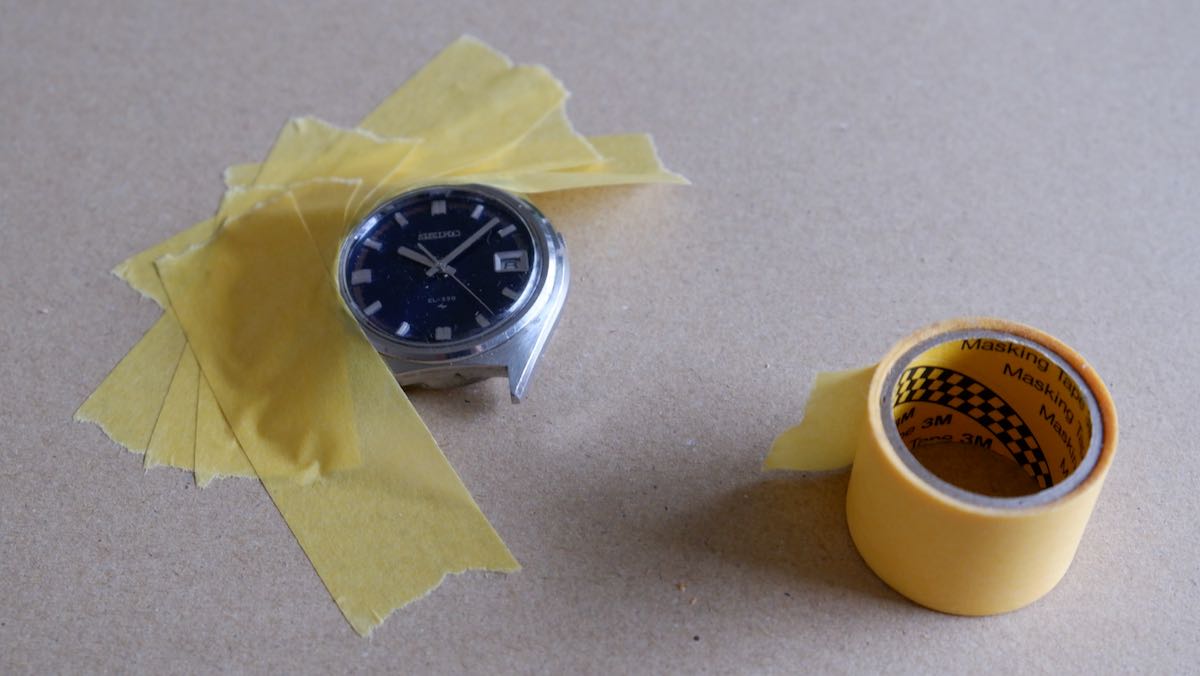
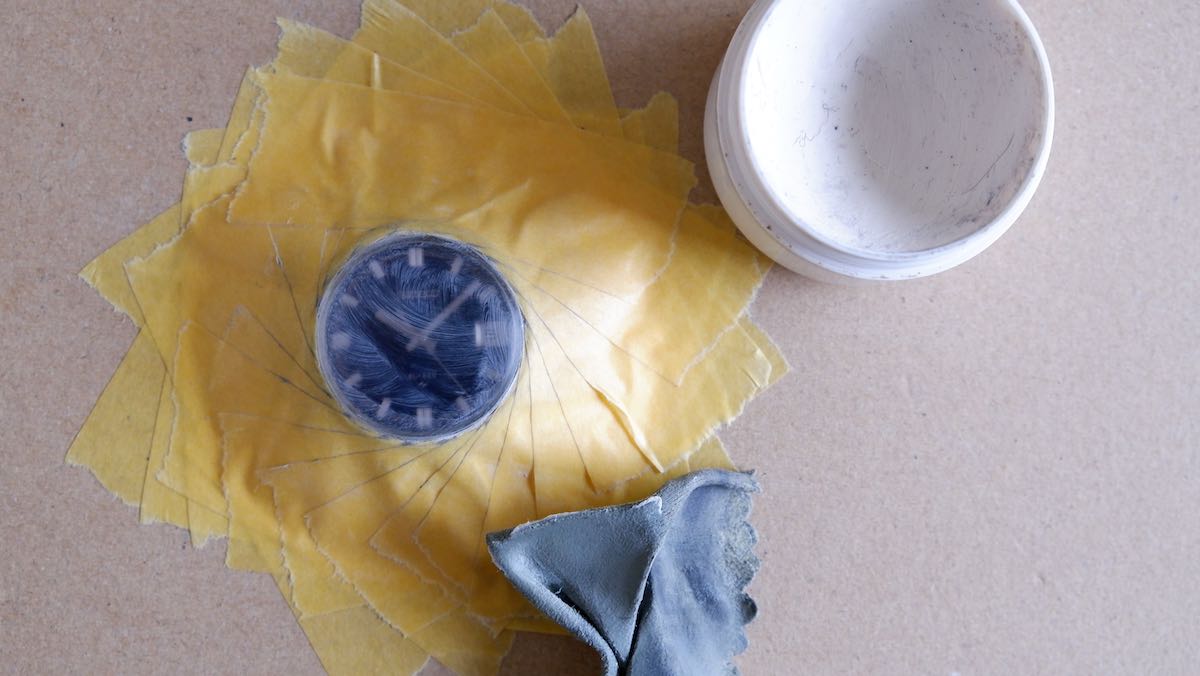
A very important step before we start: Mask off the case. Simply take multiple short strips of masking tape and cover the whole watch except for the acrylic crystal. Removing the strap first makes the whole process much easier, as does taping the watch onto something like a cardboard sheet to make it easier to hold. Make sure no metal is exposed.
Step 3
You'll need to be brave for this first stage. With the roughest paper, rub the crystal in straight lines, changing the direction occasionally to make the coverage even. At this stage it looks like we've ruined the watch but don't panic! It gets better from now on.
Step 4
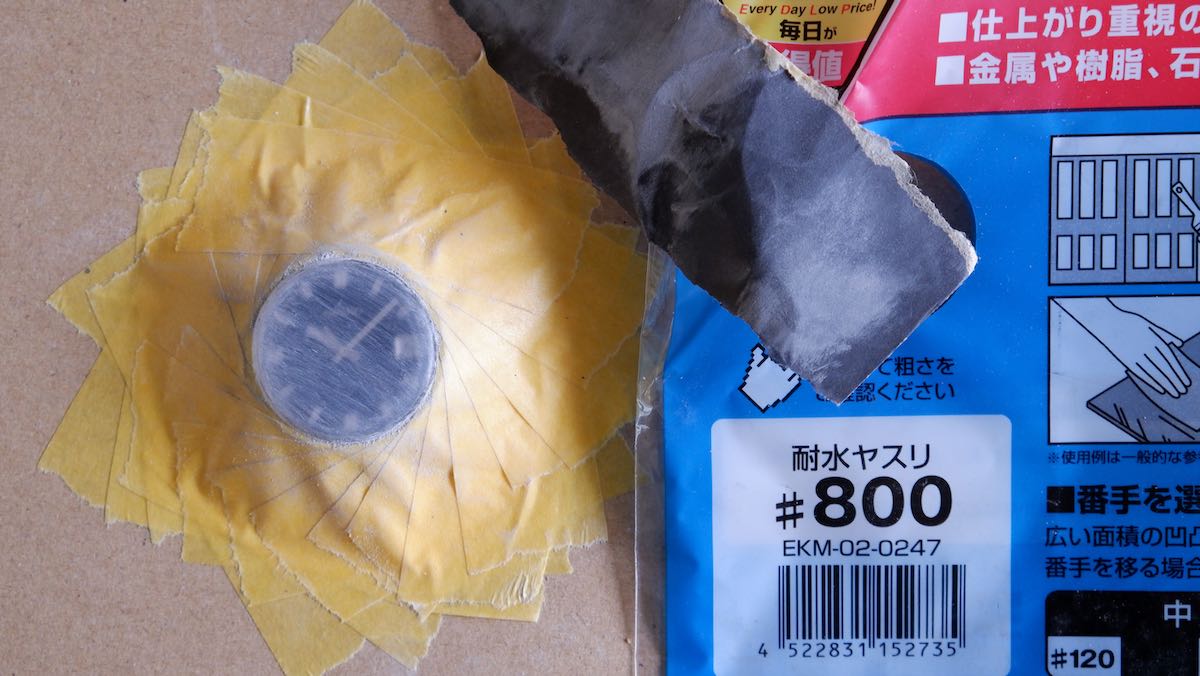
Once you think all the original scratches are gone, move up to the next finest paper, in this case grade 800. Look closely at the crystal as you work to see if you can see any of the original scratches. If you can, go back a step and use rougher sandpaper to get rid of them.
Step 5
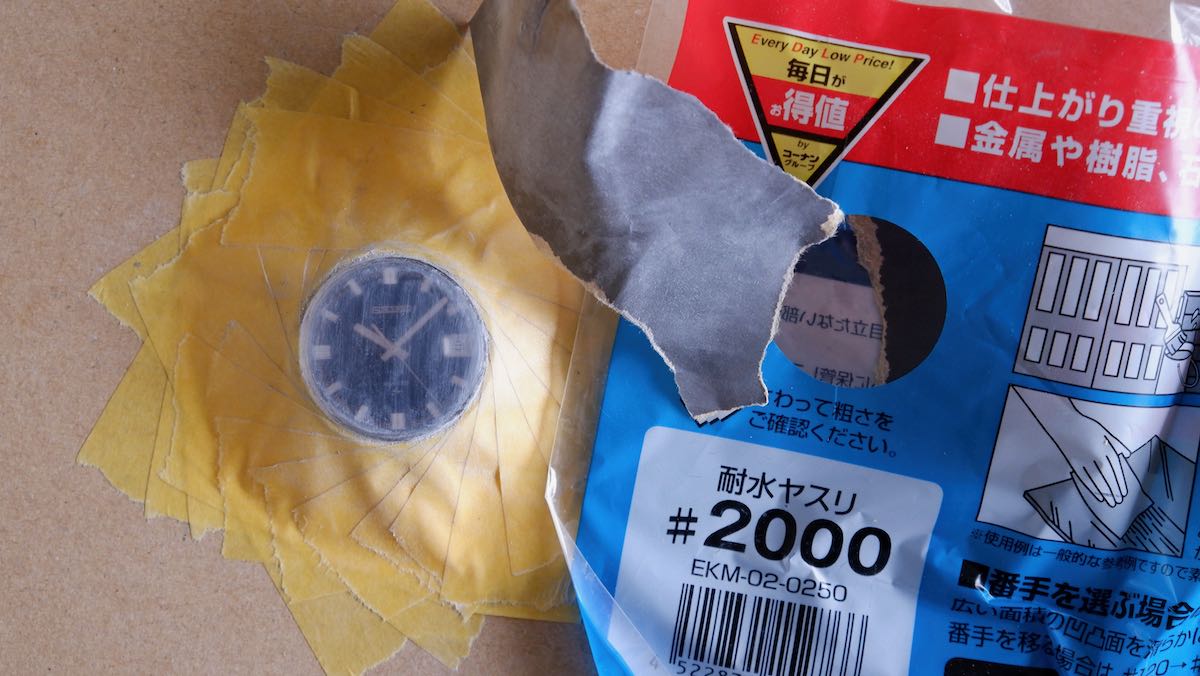
Looking good so let's go up a level to a finer sandpaper, still working in straight lines and changing direction regularly.
Step 6
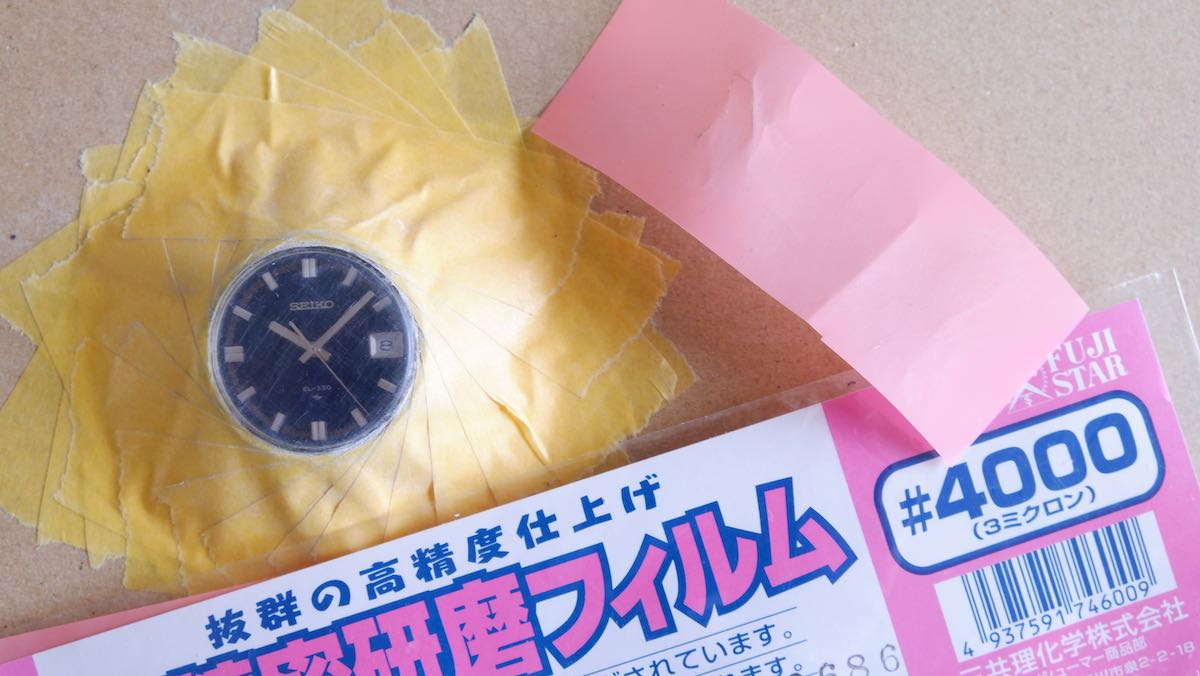
Switching to grade 4000, the "paper" is actually a plastic film with a shiny side and a slightly rough side, which is the correct side to use. Finally it looks like we're making an improvement. Phew!
Step 7
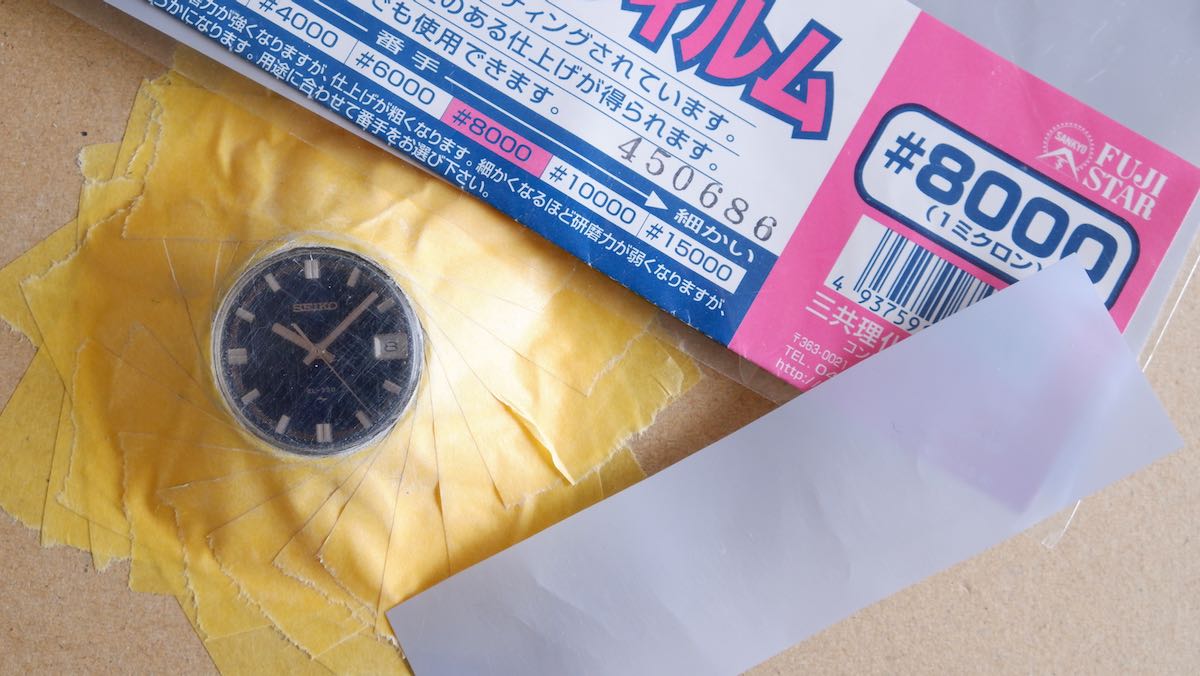
The final grade I have is 8000 which doesn't feel like it makes a big difference, but it doesn't hurt so I use it anyway. The result won't be perfect but that's fine — the remaining fine scratches can be removed with polish in the next step.
Step 8
I'm using a general metal polish here but Polywatch (a specialist product for watches) is also popular. Personally I don't think it makes a difference, just use it as you normally would by rubbing the polish generously on the crystal, this time in a circular motion.
Step 9
At last we've reached the final stage which is to wipe off the excess polish and buff with a soft cloth. Before you finish, examine the crystal closely for any scratches that remain. I found a few and went back to redo the above stages, although I re-started with grade 800 paper. Even if you repeat the process several times, re-starting with a higher grade sandpaper than the previous time will mean you're making progress with each round of steps.

Step 10
And now for the payoff. Take off the masking tape, put the strap back on and you should have a watch with a crystal (and therefore dial) that looks like new! All that effort was worth it. :-)
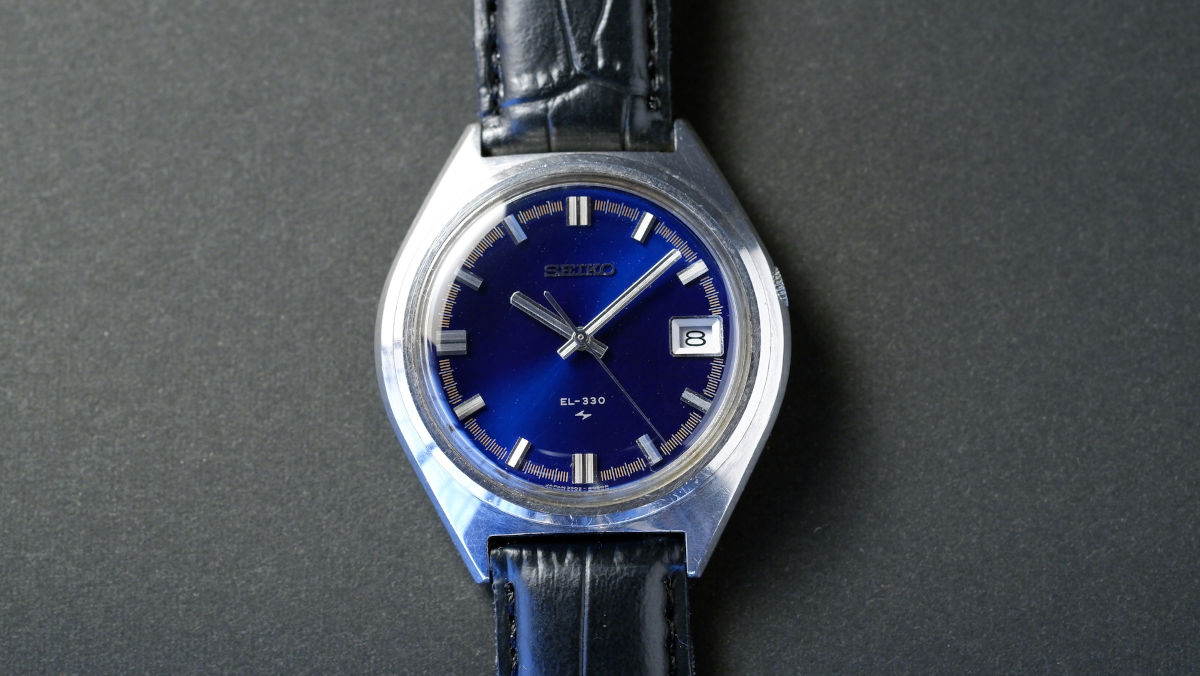
And for those wondering, the watch in this guide is a Seiko 3302-8070 EL-330 electronic watch from 1971.
If you liked this, check out more articles about repairing, restoring and enjoying Seiko watches.